XLoader - compact uploader for machine codes - Arduino
Today we will show you the possibility of uploading a compiled program - the so-called machine code into Arduino that is unreadable to the average user. However, it contains instructions that the microcontroller executes. The main advantage of machine code is that it can be uploaded to Arduino by anyone who has access to it without having libraries installed, which must often be in exact versions in order to be compatible with each other and the code can be compiled.
Machine code guarantees functionality on each platform (for which it was compiled). In this way, one firmware can be cloned into hundreds of devices that will work identically. For the upload (flashing) process, we will use the XLoader tool for Windows, which is also suitable for laymen, as it offers a simple graphical interface. This tool, like the Arduino IDE, uses the avrdude tool, which allows you to upload a compiled program to a microcontroller via a USB-UART interface.
The advantages of XLoader include the fact that it is portable and is a plug n 'play application. It does not require installation, it is equipped with dynamic discovery of COM ports. It is suitable as a portable tool for a USB key, or available on Dropbox, which we can easily clone into every computer we use. Discover COM ports means that the Arduino (or AVR chip with a USB-UART converter) will immediately appear in the COM ports menu when connected to a USB port on your computer.
By default, XLoader offers the option of choosing a target board (AtMega chip) for Arduino Uno (AtMega328), Duemilanove / Nano (AtMega328 / AtMega168), Mega (AtMega1280 / AtMega2560). Another important parameter is the path through which it is possible to set the target firmware that we want to upload to the microcontroller.
The path remains set even after closing the XLoader window (application). Thus, even when the program is turned on again, the last known path to the firmware is still set. The last parameter is the upload speed of the new firmware, standard 115200 baud / s.
But let's be fine ...
First of all, we need a project that is compiled and that we want to upload to Arduino. We will use the Ethernet thermostat project in the free version, which has available machine (.hex) codes in the Github repository: https://github.com/martinius96/termostat-ethernet/
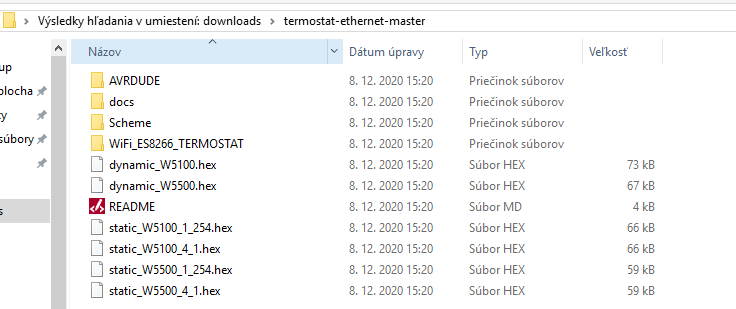
After downloading and unpacking the archive, we can see in the archive the available 6 machine codes, which have the extension (format) .hex. Machine codes are divided on the basis of the assigned IP address - statically (192.168.4.1 / 192.168.1.254 - both with a 24-bit mask), dynamically via a DHCP server in the network, but also according to the Ethernet shield used. There are options for Ethernet Wiznet W5100 or W5500 shield / module.

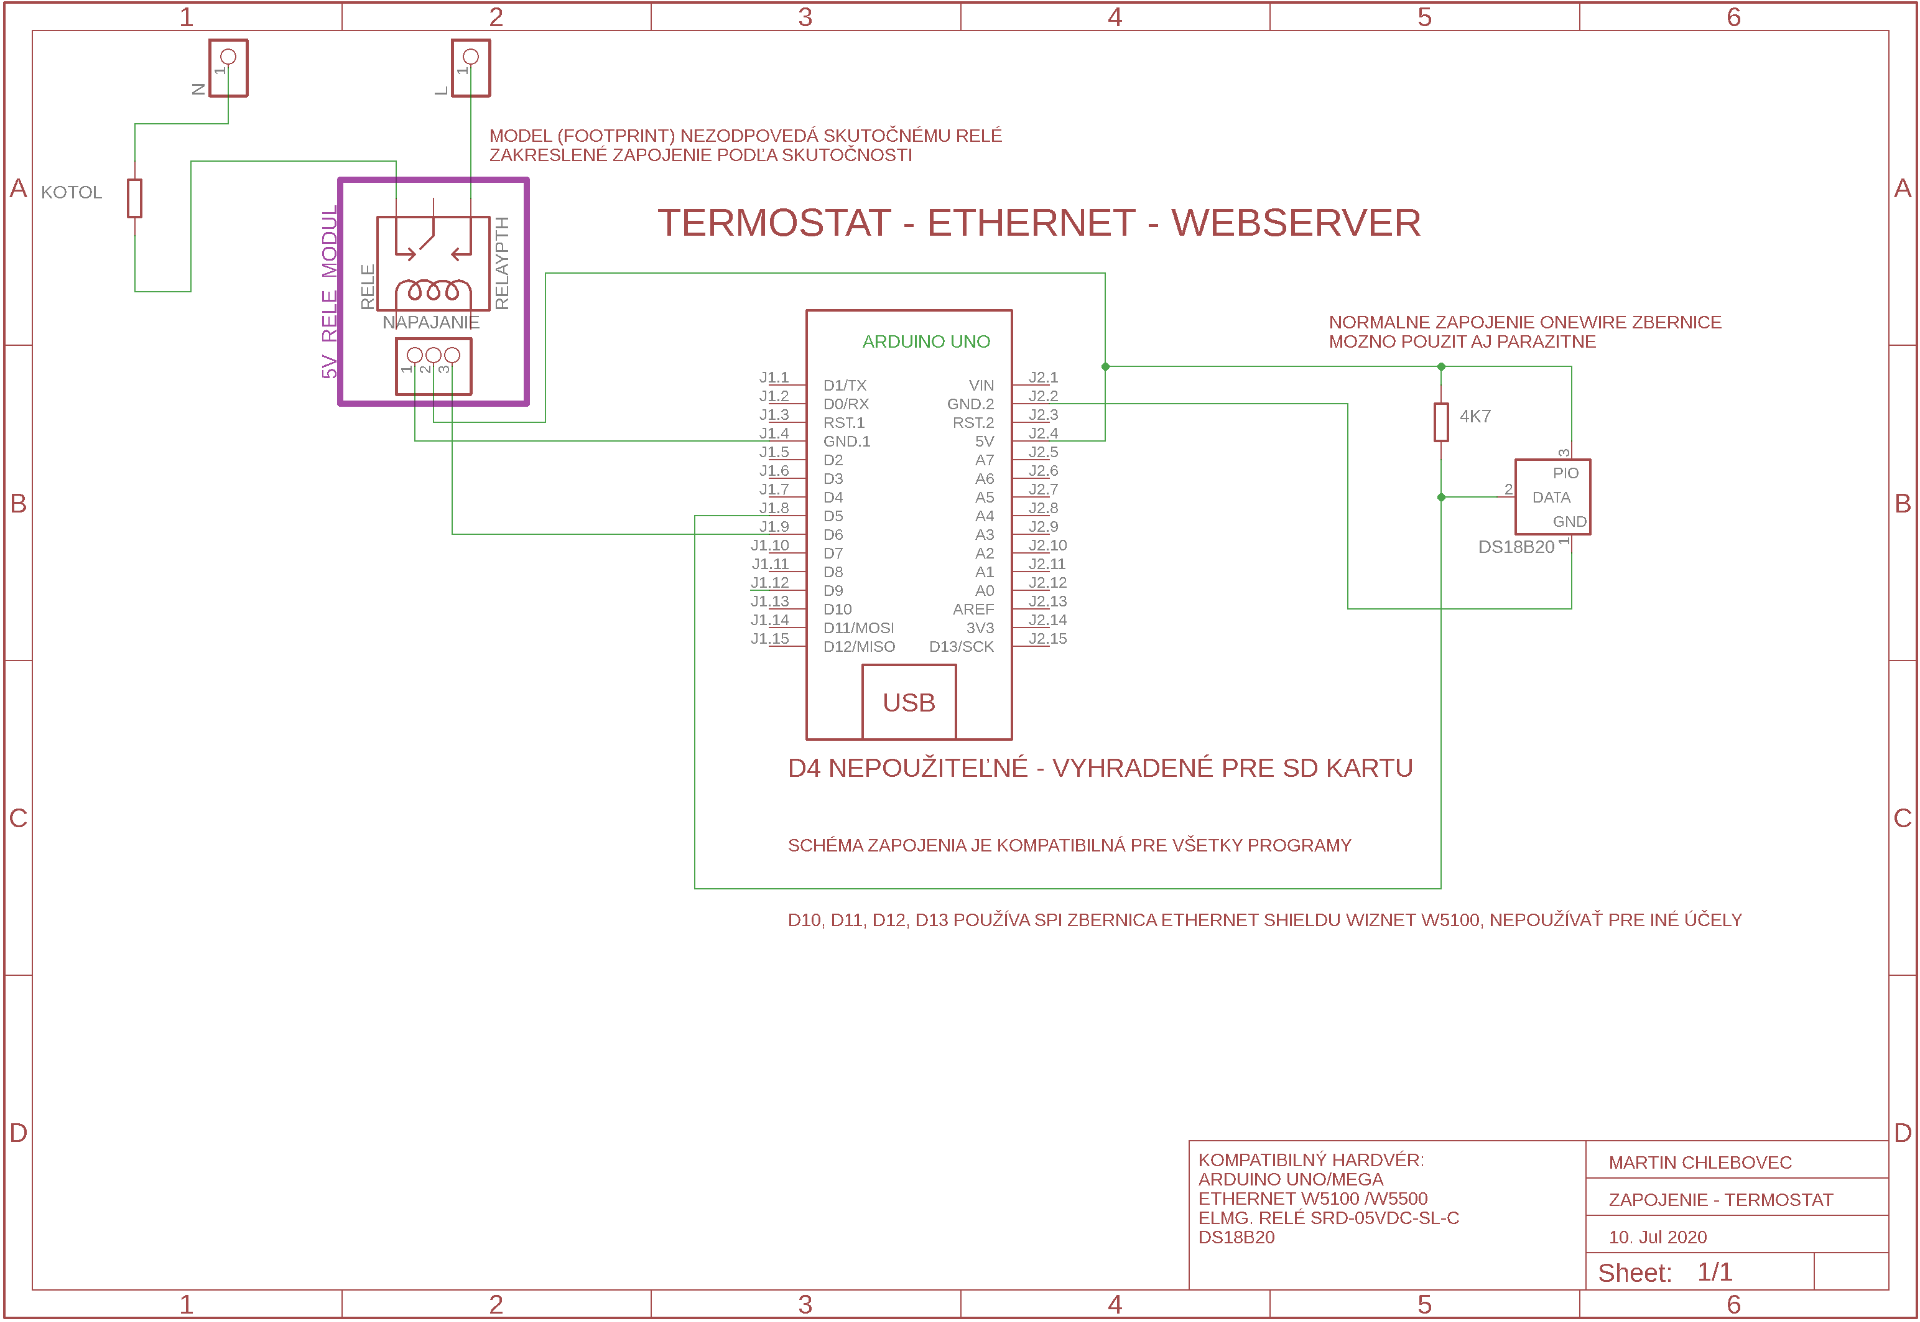
Based on the wiring diagram available in the repository, or on the project website https://martinius96.github.io/termostat-ethernet/zapojenie.html, we will insert an Ethernet shield (in our case Wiznet W5100) and data terminal D5 - emulated We connect the OneWire bus to the Dallas DS18B20 temperature sensor, which serves as a control temperature for the thermostat in the system. We connect the 5V power supply with the Vcc DS18B20 and interconnect the ground - GND terminals.

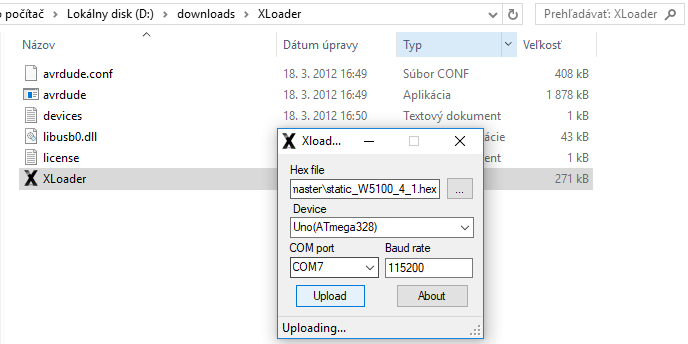
We connect the Arduino to the computer via a USB cable (we can also connect an Ethernet shield) via an Ethernet cable to the LAN network / locally to the computer. After opening XLoader, we see that the Arduino showed up on the COM7 port. We will choose the target platform for Uno for the AtMega328 chip and choose the path to the firmware. We see that we use the firmware in this tutorial: static_W5100_4_1.hex. Thus, the Ethernet shield will have an IP address of 192.168.4.1 / 24. (For testing purposes, we have connected the Arduino to a computer that has a default static IP address of 192.168.4.2 / 24) and it will be possible to connect to the Ethernet shield without having an Arduino on the LAN. network.

After clicking on Upload, the firmware - machine code will start to be uploaded automatically. The success of the firmware upload is informed by a message that replaces the Uploading .... statement with information on the number of bytes uploaded. The firmware is now loaded and the Arduino will immediately start (boot) the new thermostat firmware. The thermostat web application is available at: https://192.168.4.1. For more demanding users who want to control their thermostat over the Internet, it is possible to redirect the public IP on the router via port forwarding to Arduino, but this option may not be completely secure.
So it is recommended to use a VPN connection or control the thermostat exclusively from home LAN. The AVRDUDE tool can also be used directly through the console, but it is necessary to precisely define the COM port in the upload command, which can be annoying to search. XLoader is a suitable alternative, which brings a simple graphical interface, 100% portability, plug n 'play elements and the possibility of simple upload of firmware in machine code to the microcontroller.
